To connect a garden hose to a pressure washer, it’s important to follow a step-by-step process. In this easy guide, I’ll walk you through each step, from prepping the area to detaching from the water source. By the end, you’ll have your garden hose properly connected to your pressure washer, ready for all your pressure washing needs.
Key Takeaways:
- Properly prepping the area is crucial before connecting the garden hose to a pressure washer.
- Choose the right pressure washer and accessories based on the type of job you’ll be doing.
- Select the right nozzle for effective and efficient cleaning.
- Attach the garden hose securely to the pressure washer.
- Check the pressure and make adjustments as necessary before starting your project.
Prepping the Area
Before you start connecting your garden hose to a pressure washer, it’s important to prepare the area. This involves clearing the space and taking necessary precautions to ensure a safe and effective pressure washing process.
First, remove any obstacles in the area that could interfere with your pressure washing, such as potted plants, patio furniture, bikes, and toys. Clearing the space will provide you with a clean and open area to work with.
Next, lay down a tarp over plants and landscaping to protect them from any potential damage caused by the pressure washer. This will help prevent any chemical residues or stray debris from reaching your plants.
Additionally, it’s essential to sweep away dirt, debris, and rocks from the area you’ll be pressure washing. This will ensure that these items do not become projectiles during the pressure washing process, causing damage to your property or surrounding areas.
“Properly prepping the area prior to pressure washing can make a significant difference in the overall outcome of your cleaning project. By removing obstacles, protecting plants, and sweeping away debris, you’ll create a safe and clean environment to work in.”
| Prepping the Area | Benefits |
|---|---|
| Clearing the space | Allows for easy movement and access |
| Protecting plants with a tarp | Prevents damage from chemicals and debris |
| Sweeping away dirt and debris | Avoids potential damage and ensures a clean surface |
Summary:
Prepping the area is an important step before connecting your garden hose to a pressure washer. By clearing the space, protecting plants, and sweeping away debris, you’ll create a safe and clean environment for effective pressure washing.
Choosing a Pressure Washer and Accessories
When it comes to connecting a garden hose to a pressure washer, it’s crucial to choose the right pressure washer for your needs. There are two main types to consider: gas-powered and electric pressure washers. Gas-powered pressure washers are typically more powerful and better suited for heavy-duty jobs, such as cleaning large outdoor surfaces or removing stubborn grime. On the other hand, electric pressure washers are more lightweight and portable, making them ideal for smaller tasks like washing cars or patios. It’s important to assess the requirements of your cleaning projects and select a pressure washer that aligns with those needs.
Along with the pressure washer itself, you may also need to consider additional accessories. Pressure washer hoses, for example, are essential for connecting the garden hose to the pressure washer. They come in different lengths and materials, so choose one that is compatible with your specific pressure washer model. Extension wands can also be useful for reaching high or hard-to-reach areas during cleaning. Other accessories to consider include nozzles with different spray patterns for various cleaning tasks and detergent applicators for deep cleaning or stain removal.
Before making a decision, it’s worth researching different pressure washer brands and models, reading customer reviews, and considering factors such as power, water flow rate, and overall durability. By choosing the right pressure washer and accessories, you’ll ensure efficient and effective cleaning results while taking the hassle out of connecting your garden hose to a pressure washer.
Comparing Gas-Powered and Electric Pressure Washers
| Type | Gas-Powered | Electric |
|---|---|---|
| Power | Higher PSI and GPM | Lower PSI and GPM |
| Portability | Heavier and less portable | Lightweight and portable |
| Noise Level | Noisier | Quieter |
| Price Range | Higher cost | Lower cost |
| Cleaning Capacity | Heavy-duty tasks | Light to medium-duty tasks |
Selecting the Right Nozzle
When it comes to pressure washing, selecting the right nozzle is essential for achieving the best results. Different nozzle colors indicate different spray degrees and purposes, allowing you to customize your cleaning approach. Here’s a breakdown of the nozzle colors and their corresponding spray options:
- 0-degree spray (red nozzle): This nozzle delivers a concentrated, powerful spray that is ideal for tackling hard-to-remove dirt and oil. Use caution when using this nozzle, as the high pressure can damage delicate surfaces.
- 15-degree spray (yellow nozzle): The 15-degree spray is perfect for stripping surfaces such as decks or siding. It provides a balance between power and precision, making it suitable for medium-duty cleaning tasks.
- 25-degree spray (green nozzle): If you need to clean dirt, debris, or stains from cars, driveways, or concrete surfaces, the 25-degree spray nozzle is a great choice. It offers a wider spray pattern that covers a larger area without sacrificing cleaning effectiveness.
- 40-degree spray (white nozzle): When cleaning areas near windows or light fixtures, the 40-degree spray nozzle is the safest option. It gently removes dirt and grime without causing any damage to delicate surfaces.
- 65-degree spray (black nozzle): The 65-degree spray nozzle is typically used for cleaning cars or other smaller projects that require a combination of soap and water. It provides a wide, gentle spray that effectively loosens and rinses away dirt and debris.
By selecting the right nozzle for your pressure washer, you can optimize your cleaning efficiency and achieve the desired results for different tasks. Remember to always follow the manufacturer’s instructions and exercise caution when using high-pressure sprays to avoid any accidents or damage.
Additional Considerations for Nozzle Selection
While the nozzle color and spray angle are important factors to consider, there are a few additional considerations when selecting the right nozzle for your pressure washer:
- Water Flow Rate: Depending on the water flow rate of your pressure washer, certain nozzles may be more suitable than others. Make sure to choose a nozzle that is compatible with your pressure washer’s specifications.
- Specific Cleaning Needs: Consider the specific cleaning tasks you’ll be performing. For example, if you’re dealing with stubborn stains or heavy-duty cleaning, a nozzle with a narrower spray angle may be more effective.
- Personal Preference: Everyone has different preferences when it comes to pressure washing. Experiment with different nozzles to find the one that works best for you and achieves the desired cleaning results.
By understanding the different nozzle options available and considering your specific needs, you’ll be able to select the right nozzle for your pressure washer and tackle your cleaning projects with confidence.
Note: The image above shows a pressure washer nozzle, illustrating the different colors and spray angles mentioned in this section.
| Nozzle Color | Spray Angle | Recommended Uses |
|---|---|---|
| Red | 0 degrees | Tough dirt and oil |
| Yellow | 15 degrees | Stripping surfaces |
| Green | 25 degrees | General cleaning |
| White | 40 degrees | Delicate surfaces |
| Black | 65 degrees | Cleaning with soap |
Table: Overview of pressure washer nozzle colors, spray angles, and recommended uses.
Attaching the Garden Hose
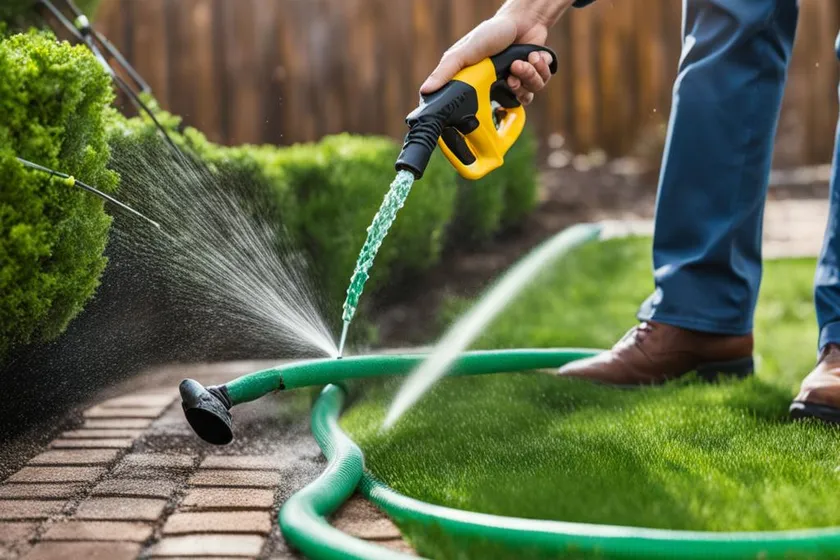
Now that we have selected the right nozzle, it’s time to attach the garden hose to the pressure washer. This is a crucial step in the process, as it establishes the connection between the water source and the pressure washer. Follow these steps to ensure a secure and leak-free attachment:
- Start by ensuring that the garden hose is connected to your home’s water supply. Check for any kinks or twists in the hose and make sure the water is turned on.
- Locate the water inlet on the pressure washer, usually indicated by a threaded connector. Remove any protective caps or covers that may be present.
- Insert the threaded end of the garden hose into the water inlet of the pressure washer. Twist it clockwise until it is securely attached. Ensure a tight connection to prevent any water leakage.
- Double-check that all connections are properly tightened and secured. Inspect the connection between the garden hose and the pressure washer to make sure there are no visible gaps or leaks.
By following these steps, you can ensure that the garden hose is properly attached to the pressure washer, establishing a strong water supply connection for effective pressure washing.
Remember, a secure and leak-free attachment is essential for optimal performance and safety during your pressure washing tasks. Now that the garden hose is properly connected, you’re ready to move on to the next step in the process.
Checking Pressure and Adjusting
Once the garden hose is securely attached to the pressure washer, it’s important to check the pressure and make any necessary adjustments before starting your cleaning project. Ensuring the correct pressure will help you achieve optimal cleaning results and avoid any potential problems.
To check the pressure, turn on the water supply and grip the pressure washer’s nozzle. Start on the lowest setting to prevent any unexpected kickback. Squeeze the trigger for about a minute to release any excess air from the system. This will ensure a smooth flow of water through the nozzle.
After checking the pressure, you may need to adjust it based on the specific requirements of your cleaning task. Some pressure washers allow you to adjust the pressure using a dial or control knob. Refer to the manufacturer’s instructions for your specific model to learn how to make the necessary adjustments.
Remember to always test the pressure by starting with a lower setting and gradually increasing it as needed. This will prevent any potential damage to the surface you are cleaning. By checking and adjusting the pressure, you can ensure a safe and effective pressure washing experience.
Starting Your Project
Now that you have successfully connected your garden hose to the pressure washer, it’s time to start your project. The startup process may vary depending on whether you have a gas-powered or electric pressure washer. Follow the manufacturer’s instructions for your specific model to ensure a safe and effective startup.
Gas-Powered Pressure Washer Startup: Before starting a gas-powered pressure washer, make sure you have enough fuel in the tank. Turn on the fuel valve and set the choke to the appropriate position. Pull the starter cord with a firm and steady motion until the engine starts. Once the engine is running, allow it to warm up for a few minutes before beginning your pressure washing.
Electric Pressure Washer Startup: To start an electric pressure washer, simply plug it into a properly grounded electrical outlet. Flip the power switch to the “on” position, and the pressure washer is ready to use. No additional steps are required for startup.
When pressure washing, it’s important to use proper techniques to achieve the best results. Start by using a wide spray pattern and maintain a consistent distance from the surface being cleaned. This will ensure even cleaning and prevent any potential damage. As you become more comfortable with the pressure washer, you can adjust the spray pattern and pressure to suit specific cleaning needs.
Remember to always be cautious and wear appropriate safety gear, including safety goggles and closed-toe shoes. Keep a firm grip on the pressure washer and be aware of your surroundings to avoid any accidents. With these tips in mind, you’re ready to start your pressure washing project and achieve a clean and fresh-looking outdoor space.
Turning Off the Machine
Safety Precautions for Shutting Down a Pressure Washer
When you’re finished with your pressure washing project, it’s essential to follow the proper procedure for turning off the machine. By taking the necessary safety precautions, you can ensure your own well-being and the longevity of your pressure washer.
First, release the trigger on the pressure washer and turn on the safety lock. This step is crucial to prevent any accidental spraying or start-ups, which can be hazardous. By engaging the safety lock, you minimize the risk of injury.
Next, turn off the water source to the pressure washer. However, it’s important to note that you should not immediately detach the garden hose from the machine if the main water source is still on. This is because pressure can build up in the hose, and if released suddenly, it could cause injury or damage. It’s best to wait until the pressure has dissipated before detaching the hose.
Finally, turn off the safety lock on the pressure washer, and pull the trigger to remove any excess water and pressure from the system. This will help prevent any remaining water from freezing inside the machine, which can lead to damage.
| Safety Precautions for Turning Off a Pressure Washer |
|---|
| Step 1: Release the trigger and turn on the safety lock |
| Step 2: Turn off the water source, but do not immediately detach the garden hose |
| Step 3: Turn off the safety lock on the pressure washer, and pull the trigger to remove excess water and pressure |
By following these safety precautions, you can ensure a smooth and secure shutdown of your pressure washer. Remember to always prioritize your safety and the proper care of your equipment.
Detaching from the Water Source
Once you have completed your pressure washing project, it is important to properly detach the garden hose from the pressure washer and disconnect it from the water source. This ensures the safety of both the equipment and yourself.
To detach the garden hose from the pressure washer, follow these steps:
- Turn off the pressure washer and release the trigger to relieve any built-up pressure.
- Locate the water inlet where the hose is connected to the pressure washer. Twist or unscrew the connection to loosen it.
- Gently pull the garden hose away from the pressure washer, being careful not to bend or damage the hose.
Once the garden hose is detached from the pressure washer, you can proceed to disconnect it from the water source. Follow these steps:
- Locate the connection between the garden hose and the water source, which is typically an outdoor faucet.
- Twist or unscrew the connection to loosen it.
- Gently pull the garden hose away from the water source.
After detaching the garden hose, it is important to properly store it in a dry location to prevent damage. Additionally, if you rented the pressure washer, remember to return it to the rental store.
Safety Precautions
When detaching the garden hose from the pressure washer and disconnecting it from the water source, it is crucial to follow these safety precautions:
- Ensure that the pressure washer is turned off and the trigger is released to relieve any built-up pressure.
- Avoid bending or kinking the garden hose during the detachment process to prevent damage.
- Be cautious of any remaining water in the hose, as it may still be under pressure. Slowly release any remaining water by squeezing the trigger on the pressure washer head until the water stops flowing.
- Store the garden hose in a dry area to prevent it from being exposed to the elements, which can cause deterioration.
By following these safety precautions, you can ensure a smooth and safe detachment process when removing the garden hose from the pressure washer and disconnecting it from the water source.
Pressure Washing Tips
When it comes to pressure washing, following these tips and best practices will help you achieve optimal results while ensuring your safety. Here are some key tips to keep in mind:
- Choose the right nozzle: Selecting the correct nozzle for your pressure washer is essential for efficient cleaning. Different nozzle colors indicate different spray degrees and purposes. Make sure to use the appropriate nozzle for the task at hand.
- Maintain a consistent distance: When pressure washing, it’s crucial to maintain a consistent distance between the nozzle and the surface being cleaned. This will ensure thorough cleaning without causing damage to the surface.
- Use appropriate pressure: Adjust the pressure of your pressure washer according to the specific cleaning task. Start with a lower pressure and gradually increase if necessary to avoid causing any damage.
- Protect yourself: Always wear safety goggles, closed-toe shoes or boots, and other appropriate protective gear when operating a pressure washer. This will help prevent any injuries from debris or the high-pressure spray.
- Be mindful of surrounding objects: Take care to protect nearby objects, such as windows, light fixtures, and delicate plants, from the high-pressure spray. Use a tarp or cover as needed to prevent any damage.
Following these pressure washing tips will help you achieve effective cleaning while ensuring your safety. Keep these best practices in mind for all your pressure washing projects.
| Pressure Washing Tips | Description |
|---|---|
| Choose the right nozzle | Select the appropriate nozzle color and spray degree for your cleaning task. |
| Maintain a consistent distance | Keep a consistent distance between the nozzle and the surface being cleaned to ensure thorough cleaning without causing damage. |
| Use appropriate pressure | Adjust the pressure of your pressure washer for each cleaning task to avoid damage. |
| Protect yourself | Wear safety goggles, closed-toe shoes or boots, and protective gear to prevent injuries from debris or high-pressure spray. |
| Be mindful of surrounding objects | Protect nearby objects, such as windows, light fixtures, and plants, from the high-pressure spray to avoid damage. |
The Difference Between a Garden Hose and a Pressure Hose
When it comes to connecting a garden hose to a pressure washer, it’s important to understand the key differences between these two types of hoses. While a garden hose is typically used for basic watering tasks with a relatively low water flow rate, a pressure hose is designed specifically for use with a pressure washer and can handle much higher water flow rates and pressure levels.
A garden hose is typically made of a flexible material like rubber or vinyl and is designed to withstand moderate water pressure, usually ranging from 80 to 150 PSI. It is primarily used for tasks such as watering plants, washing cars, or filling pools. On the other hand, a pressure hose is constructed with more durable materials, such as reinforced synthetic fibers or steel braiding, to withstand the high water pressure generated by a pressure washer. Pressure hoses are typically rated for water flow rates ranging from 1000 to 6000 PSI, depending on the specific requirements of the pressure washer.
“A garden hose is designed for everyday use, while a pressure hose is specifically engineered to handle the high pressures generated by a pressure washer.”
Using a garden hose instead of a pressure hose with a pressure washer can lead to several issues. Firstly, a garden hose may not be able to handle the high water flow rates and pressure levels required for effective pressure washing, resulting in reduced cleaning power and inefficient operation. Additionally, the connections between a garden hose and a pressure washer may not be compatible, leading to leaks or improper fittings that can cause damage to the equipment and potential injury to the user.
“It’s crucial to use a pressure hose designed for high PSI ratings and compatible with your pressure washer to ensure safe and effective operation.”
In summary, a garden hose and a pressure hose serve different purposes and have distinct design features to handle varying water flow rates and pressure levels. When connecting a hose to a pressure washer, it’s essential to use a pressure hose specifically designed for high PSI ratings to ensure optimal performance, efficient cleaning, and the safety of both the equipment and the user.
Table: Garden Hose vs. Pressure Hose
| Garden Hose | Pressure Hose |
|---|---|
| Designed for everyday use | Specifically engineered for pressure washer use |
| Handles water flow rates up to 80-150 PSI | Handles water flow rates up to 1000-6000 PSI |
| Constructed with flexible materials like rubber or vinyl | Constructed with reinforced synthetic fibers or steel braiding |
| Used for tasks such as watering plants or washing cars | Used exclusively for pressure washing with a pressure washer |
| May not be compatible with pressure washer connections | Designed for proper fittings and compatibility with pressure washers |
How to Connect a Garden Hose to a Pressure Washer: The Setup
Connecting a garden hose to a pressure washer requires a step-by-step process to ensure a proper setup. Let’s walk through the garden hose connection process and pressure washer setup in detail:
Step 1: Test the Gallons Per Minute (GPM)
Before connecting your garden hose to the pressure washer, it’s essential to test the gallons per minute (GPM) from your water source. This will help you determine if the flow rate is adequate for proper pressure washer operation. Simply fill a bucket with water from your outdoor spigot for one minute and measure the amount of water collected. If the GPM falls within the recommended range for your pressure washer, you can proceed to the next step.
Step 2: Consider Using a Splitter
If you want to avoid disconnecting your everyday garden hose, consider attaching a splitter to your water source. This allows you to have a dedicated connection for your pressure washer without disrupting the existing garden hose setup. With a splitter in place, you can easily switch between using your garden hose and connecting it to the pressure washer when needed.
Step 3: Install Quick Connect Fittings
To make the connection between the garden hose and pressure washer easier and more secure, it’s recommended to install quick connect fittings. These fittings allow for a quick and tool-free attachment, ensuring a tight and leak-free connection. Follow the manufacturer’s instructions to install the quick connect fittings on both the pressure washer and garden hose.
Step 4: Connect the Garden Hose to the Pressure Washer
Finally, it’s time to connect the garden hose to the pressure washer. Use a leader hose of appropriate length to bridge the gap between the pressure washer and the garden hose. Attach one end of the leader hose to the pressure washer’s water inlet and the other end to the garden hose’s male connector. Ensure that all connections are tight and secure to prevent any water leakage during operation.
By following these steps, you can successfully connect your garden hose to a pressure washer, setting up a reliable and efficient cleaning system for your outdoor projects.
| Step | Description |
|---|---|
| Step 1 | Test the GPM from your water source to ensure an adequate flow rate. |
| Step 2 | Consider using a splitter if you want to avoid disconnecting your everyday garden hose. |
| Step 3 | Install quick connect fittings for an easier and more secure attachment. |
| Step 4 | Connect the garden hose to the pressure washer using a leader hose of appropriate length. |
Following these steps will ensure a smooth garden hose connection process and a properly set up pressure washer for your outdoor cleaning needs.
Pressure Washing on a Budget
Looking to give your outdoor surfaces a good cleaning without breaking the bank? Pressure washing can be an effective way to remove dirt, grime, and stains, but investing in a pressure washer can be costly. Fortunately, there are some cost-effective alternatives available for those on a budget. One option to consider is high-pressure spray attachments for garden hoses, such as the Hydro Jet Power Spray Nozzle.
These attachments provide a marginal increase in water pressure compared to a standard garden hose nozzle, making them suitable for light cleaning tasks. While they cannot match the high PSI provided by a gas or electric power washer, they are effective for removing loose dust and debris. Just attach the nozzle to your garden hose, adjust the spray pattern, and you’re ready to go.
It’s important to note that for heavier cleaning tasks or stubborn stains, a pressure washer will still provide the best results. However, if you only need occasional light cleaning or want to save money, a high-pressure spray attachment can be a practical and affordable option. Keep in mind that these attachments do not replace the power and versatility of a pressure washer, so they may not be suitable for all outdoor cleaning projects.
Safety Tips for Using High-Pressure Spray Attachments:
- Always wear safety goggles and gloves to protect yourself from debris and high-pressure water.
- Be cautious when using the spray attachment around delicate surfaces or plants, as the increased pressure may cause damage.
- Read and follow the manufacturer’s instructions for proper use and maintenance of the attachment.
- Never aim the spray attachment at people or animals and avoid spraying electrical outlets or equipment.
- Store the attachment in a safe place, away from children and pets, when not in use.
While a pressure washer may be the ideal choice for heavy-duty cleaning, a high-pressure spray attachment can be a practical and affordable alternative for light cleaning tasks. By considering your specific needs and budget, you can choose the option that best fits your requirements. Whether you opt for a pressure washer or a spray attachment, always prioritize safety and follow the appropriate precautions for a successful and efficient cleaning experience.
Conclusion
So, there you have it! Connecting a garden hose to a pressure washer is a simple process that can make a huge difference in tackling your outdoor cleaning projects. By following the step-by-step guide outlined in this article, you can ensure that your garden hose is securely attached to your pressure washer, ready to unleash its cleaning power.
Remember, preparation is key. Clear the area, choose the right pressure washer and accessories, and select the appropriate nozzle for your cleaning needs. Attaching the garden hose properly, checking the pressure, and adjusting as necessary will ensure smooth operation. Always follow the manufacturer’s instructions for starting and turning off the machine.
And let’s not forget about safety! Wear appropriate gear, be cautious with your surroundings, and never use a gas-powered pressure washer in an enclosed space. Following these guidelines will help you achieve the best results while keeping yourself and others safe.
Now that you know how to connect a garden hose to a pressure washer, you’re ready to tackle your next outdoor cleaning project with confidence. So go ahead, enjoy the satisfaction of a job well done, and make your outdoor spaces shine!
FAQ
How do I connect a garden hose to a pressure washer?
To connect a garden hose to a pressure washer, start by prepping the area and removing any obstacles. Choose the right pressure washer for your needs and select the appropriate nozzle. Attach the garden hose to the pressure washer’s water inlet, check the pressure, and make any necessary adjustments. Start the pressure washer and use a grid pattern for effective cleaning. When finished, turn off the machine, release the trigger, and detach the garden hose.
How do I choose the right nozzle for my pressure washer?
The nozzle you choose depends on the type of cleaning you’ll be doing. Different nozzle colors indicate different spray degrees and purposes. For hard-to-remove dirt and oil, use a 0-degree spray (red nozzle). Stripping a deck or siding requires a 15-degree spray (yellow nozzle). Cleaning cars and driveways can be done with a 25-degree spray (green nozzle). For areas near windows or light fixtures, use a 40-degree spray (white nozzle). A 65-degree spray (black nozzle) is typically used for cleaning cars or smaller projects that require soap and water.
How do I check the pressure and make adjustments on a pressure washer?
After attaching the garden hose, turn on the water supply and test the nozzle by squeezing the trigger on the pressure washer head. Start on the lowest setting to avoid kickback. Squeeze the trigger for about one minute to release any excess air. Adjust the nozzle to your project’s needs. Be sure to follow the manufacturer’s instructions for your specific pressure washer model.
How do I start and shut down a pressure washer?
The startup process will differ depending on whether you have a gas-powered or electric pressure washer. Follow the manufacturer’s instructions for your specific model. When shutting down the pressure washer, release the trigger and turn on the safety lock to prevent accidental spraying or start-ups. Turn off the water source, but do not immediately detach the hose if the main water source is still on. Turn off the safety lock on the pressure washer and pull the trigger to remove excess water and pressure.
What precautions should I take when pressure washing?
Always make sure your pressure washer is on a flat surface to prevent tipping or instability. When pressure washing decks, it’s recommended to do so at least once or twice a year. Use a high-pressure nozzle at a 45-degree angle for effective cleaning. When cleaning your car, use an electric pressure washer and consider using pressure washer surface cleaner or detergent. Be cautious when pressure washing siding, keeping the nozzle about 4 feet away to avoid damaging the surface. Avoid spraying windows and exterior lighting fixtures. Never use a pressure washer while on a ladder and always wear safety goggles, closed-toe shoes or boots, and other safety gear. Additionally, never use a gas-powered pressure washer in an enclosed space due to fumes and stay at least six feet away from power lines.
What’s the difference between a garden hose and a pressure hose?
While a garden hose can handle a PSI rating of around 80-150, a pressure washer requires a hose specifically designed for high PSI. The water pressure from a pressure washer can range from 1000 to 6000 PSI, depending on the machine. It’s important to use a pressure washer-rated hose to ensure proper water flow and prevent leaks or damage.