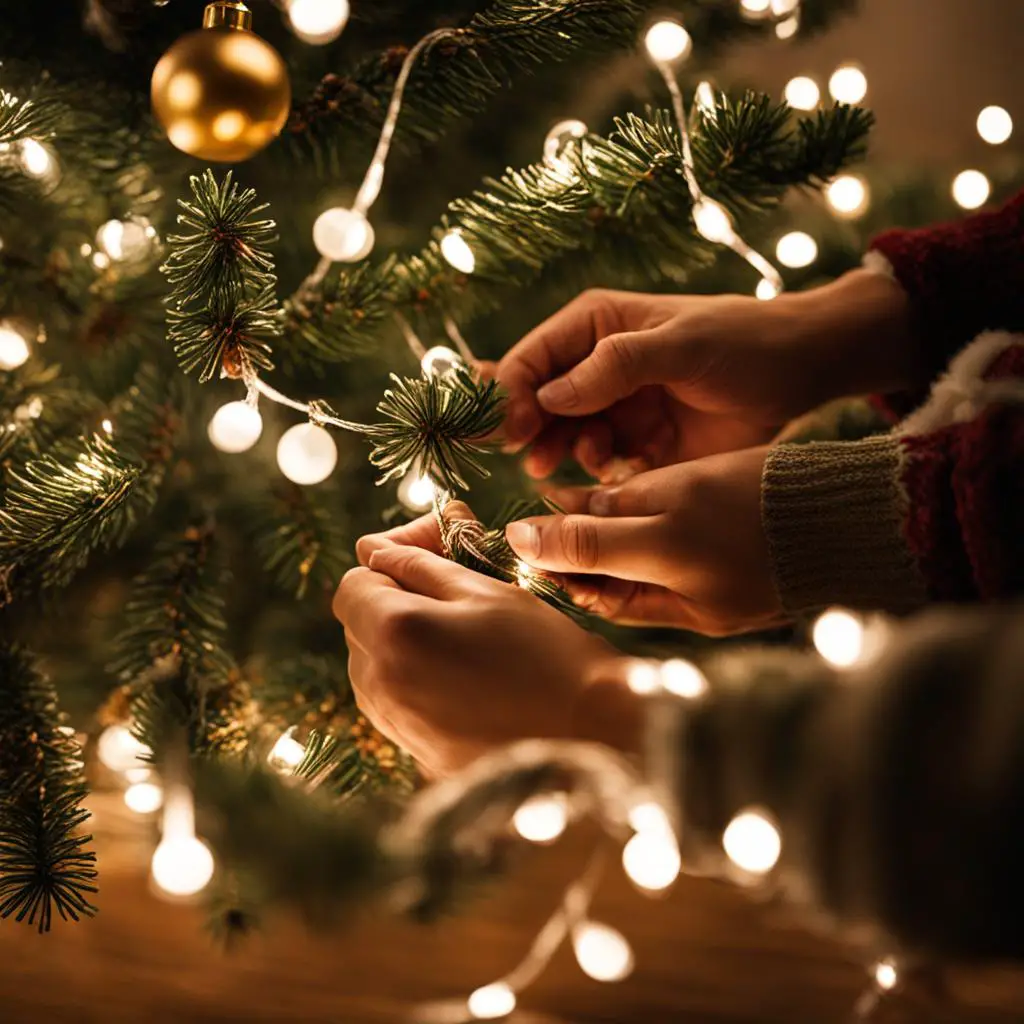
When it comes to creating a beautifully illuminated Christmas tree, following expert techniques is key. The way you wrap your Christmas tree lights can make a big difference in the overall appearance of your tree. In this tutorial, I will share some tips and tricks to help you achieve stunning results.
Key Takeaways:
- Calculating the number of lights needed is an important step before starting.
- Start wrapping the lights at the base of the tree and work your way up.
- Hide unsightly plugs and cords by pushing them into the branches.
- Adjust the lights for a uniform and balanced look.
- Consider adding special lighting effects for a personalized touch.
Determine the Number of Lights Needed
Before you start wrapping your Christmas tree with lights, it’s important to calculate how many lights you will need. A general rule of thumb is to aim for approximately 100 lights per foot of the tree, but this can be adjusted based on personal preference. To ensure all bulbs are working properly, it’s recommended to plug in the lights before starting.
By determining the number of lights needed, you can avoid running out of lights midway through the wrapping process. This step will also help you achieve a balanced and evenly lit tree. Keep in mind that more lights can create a more dazzling effect, while fewer lights may create a more subtle and intimate ambiance.
To calculate the number of lights, measure the height of your Christmas tree and multiply it by 100. For example, if your tree is 6 feet tall, you would need approximately 600 lights. This estimate is a good starting point, but you can always adjust the number based on your personal preference and the size and density of your tree.
| Tree Height (in feet) | Number of Lights |
|---|---|
| 4 | 400 |
| 5 | 500 |
| 6 | 600 |
| 7 | 700 |
| 8 | 800 |
Start at the Base of the Tree
When it comes to wrapping Christmas tree lights like a pro, it’s essential to begin the process at the base of the tree. This technique ensures a clean and organized look as you work your way up. Start by securing the first strand of lights around the trunk, making sure it is tightly in place. Then, carefully wrap the branches, weaving the lights in and out for an organic and natural appearance. Remember to adjust the placement of the lights, placing some deeper into the branches and others closer to the front, to create depth and a more visually appealing effect.
By starting at the base and working your way up, you can maintain control over the positioning of the lights and avoid tangling or unevenness. Take your time and be patient, ensuring that each branch is evenly covered with lights. This technique will help you achieve a professional-looking result and make your Christmas tree shine brightly throughout the holiday season.
Table: Branch Placement Techniques
| Placement | Description |
|---|---|
| Deeper into the branches | By placing some lights deeper into the branches, you can create a sense of depth and add visual interest to your tree. |
| Closer to the front | Placing lights closer to the front of the branches will ensure they are visible and provide a vibrant glow. |
“Starting at the base of the tree and working your way up allows for greater control over the placement of lights. This technique ensures a more professional and aesthetically pleasing result.”
- Secure the first strand of lights around the trunk at the base of the tree.
- Weave the lights in and out of the branches as you work your way up.
- Place some lights deeper into the branches and others closer to the front for depth and dimension.
Hide Unsightly Plugs and Cords
When it comes to wrapping Christmas tree lights, it’s important to not only create a beautifully illuminated tree but also ensure a clean and tidy appearance. One common concern is the visibility of plugs and cords, which can distract from the overall aesthetic. Luckily, there are easy methods to hide unsightly plugs and cords for a seamless look.
One technique is to push the green plug deep into the branches, making it less noticeable. By doing so, the connection between one string of lights and another becomes more discreet, resulting in a cleaner appearance. Additionally, if the lights are not hanging exactly where you want them, you can use floral wire to hold them in place. Bend the loose ends of the wire towards the back of the tree for safety and to further hide any visible cords.
| Easy Steps to Hide Plugs and Cords |
|---|
| 1. Push the green plug deep into the branches to make it less noticeable. |
| 2. Use floral wire to hold lights in place, bending the loose ends towards the back of the tree. |
| 3. Ensure all cords are neatly organized and hidden from view. |
| 4. Step back and adjust lights as needed to create a balanced and visually appealing display. |
By following these simple steps, you can easily hide unsightly plugs and cords, allowing the focus to be on the beautiful lights and the overall charm of your Christmas tree. Remember to prioritize safety while working with lights, and always make sure to plug them into a ground fault circuit interrupter for added protection.
Tips for Wrapping Christmas Tree Lights
When it comes to wrapping Christmas tree lights, there are a few tips and techniques that can help you achieve a beautifully illuminated tree. Here are some helpful tips to keep in mind:
- Start at the base: Begin by securing the first strand of lights around the trunk of the tree. As you work your way up, wrap the branches, making sure to weave the lights in and out for a natural look.
- Remove unattractive branches: If you come across a drooping or unattractive branch, clip it from behind with a pair of florist shears. This will help maintain the overall appearance of the tree and make it easier to wrap the lights evenly.
- Adjust for a uniform look: Step back and squint your eyes to view the tree. Look for any dark spots or areas with too many lights. Adjust individual lights or add an extra strand to achieve a uniformly lit tree.
By following these tips, you can create a beautifully lit Christmas tree that adds a festive glow to your holiday decor.
“Start at the base and work your way up, wrapping the branches as you go. Make sure to weave the lights in and out of the branches for a more organic look.”
Additionally, don’t forget about safety precautions when working with Christmas tree lights. Avoid overloading circuits by using a ground fault circuit interrupter device. Test the lights before installing them on the tree and regularly check for any loose connections or damaged bulbs.
Remember, wrapping Christmas tree lights is an art that can transform your tree into a magical centerpiece for the holiday season. Enjoy the process of creating a stunning Christmas tree that will be the highlight of your holiday decor.
Table: Recommended Number of Lights per Tree Height
| Tree Height | Number of Lights |
|---|---|
| 4-6 feet | 400-600 lights |
| 6-8 feet | 600-800 lights |
| 8-10 feet | 800-1000 lights |
| 10-12 feet | 1000-1200 lights |
Consider Vertical Wrapping Technique
When it comes to wrapping Christmas tree lights, most people are familiar with the horizontal technique. However, an alternative method that can create a unique and visually appealing look is the vertical wrapping technique. Instead of starting at the base of the tree and spiraling upwards, the vertical technique involves starting at the bottom and working your way up in a vertical direction.
By utilizing the vertical wrapping technique, you can achieve a three-dimensionality that adds depth to your tree’s lighting display. This method is especially effective when using different colors or types of lights, as it allows you to create distinct vertical columns of lights that stand out against the branches. Experiment with both the horizontal and vertical techniques to find the style that best complements your tree and personal taste.
To illustrate the differences between the two techniques, refer to the table below:
| Horizontal Wrapping Technique | Vertical Wrapping Technique |
|---|---|
| Start at the base of the tree and spiral upwards | Start at the bottom and work your way up vertically |
| Weave the lights in and out of the branches for a natural look | Create distinct vertical columns of lights |
| Place lights deeper into the branches for added depth | Highlight the vertical lines by spacing lights evenly |
| Works well for standard string lights | Enhances the effect of different colors or types of lights |
As you can see, both techniques have their own advantages and can create beautiful lighting displays. The choice between horizontal and vertical wrapping ultimately depends on your personal preference and the desired effect you want to achieve.
Adding Depth and Personality
When it comes to wrapping Christmas tree lights, it’s not just about the technique, but also about adding depth and personality to your tree. By incorporating additional strands of lights or different types of lights, you can create a truly unique and impressive display. Layering tiny LED fairy lights or colored floor spotlights can create a dramatic effect and enhance the overall appearance of the tree. Be generous with the number of lights used for a more impressive display.
Another way to add depth and personality is to use different colors of lights. Consider using warm white lights for a traditional and cozy feel, or go for vibrant multicolor lights for a festive and playful look. You can also experiment with different lighting patterns, such as alternating colors or twinkling lights, to create a mesmerizing effect.
Remember, the key is to be creative and have fun with your Christmas tree lighting. Don’t be afraid to think outside the box and try something new. Let your personal style and taste shine through in the way you wrap and decorate your tree. With a little imagination and the best way to wrap Christmas tree lights, you can create a stunning centerpiece for your holiday decor.
Focus on Safety
When it comes to wrapping Christmas tree lights, safety should always be a top priority. To ensure a safe and enjoyable holiday season, it’s important to follow proper safety guidelines when working with electrical components.
One important safety measure is to avoid overloading circuits. It’s recommended to use a ground fault circuit interrupter (GFCI) device when plugging in your lights. This device helps protect against electrical shock and can detect and interrupt power if a fault is detected.
“Using a ground fault circuit interrupter can provide an extra layer of safety when working with Christmas tree lights. It’s a simple and effective way to prevent potential electrical hazards.” – Electrical Safety Expert
When connecting multiple strands of lights, be mindful of the recommended limit. Overloading the electrical outlets and extension cords can lead to overheating and potential fire hazards. Always check the manufacturer’s instructions for the maximum number of lights that can be safely connected together.
For outdoor trees, it’s important to use lights specifically rated for exterior use. These lights are designed to withstand the elements and have additional weatherproofing features. Additionally, outdoor lights should be plugged into a ground fault circuit interrupter for added protection against electrical shocks.
| Outdoor Tree Lighting Safety Tips |
|---|
| Use lights rated for exterior use |
| Plug lights into a ground fault circuit interrupter |
| Securely attach lights using plastic gutter clips |
| Organize cords neatly to prevent tripping hazards |
By following these safety precautions, you can enjoy the festive glow of your Christmas tree lights with peace of mind. Remember to always prioritize safety when working with electrical components and keep an eye out for any signs of loose connections or damaged bulbs.
Tips for Wrapping Christmas Tree Lights
When it comes to wrapping Christmas tree lights, there are a few key tips to keep in mind to achieve a beautifully illuminated tree. Here are some expert techniques to help you create a uniform and visually appealing look:
- Start at the base of the tree: Begin by securing the first strand of lights around the trunk of the tree. As you work your way up, weave the lights in and out of the branches to create an organic and natural look. Remember to place some lights deeper into the branches and some closer to the front for added depth.
- Hide unsightly plugs and cords: When connecting one string of lights to another, hide the green plug by pushing it deep into the branches. This will give your tree a cleaner appearance. Use floral wire to hold the lights in place if they are not hanging exactly where you want them.
- Adjust for a uniform look: Once all the lights are in place, step back and squint your eyes to view the tree. Look for any dark spots or areas that may have too many lights. Adjust individual lights or add an extra strand to achieve a uniformly lit tree.

By following these tips, you can create a beautifully illuminated Christmas tree that will be the highlight of your holiday decor. Whether you prefer a traditional horizontal wrapping technique or want to try a vertical approach, don’t be afraid to experiment and find the style that suits your personal taste.
“The goal is to create a balanced and pleasing visual effect.”
Table: Recommended Number of Lights per Tree Height
| Tree Height | Number of Lights |
|---|---|
| 4-6 feet | 400-600 lights |
| 6-8 feet | 800-1,200 lights |
| 8-10 feet | 1,200-1,800 lights |
Keep in mind that these are general guidelines, and you can adjust the number of lights based on personal preference. Remember to prioritize safety by not overloading circuits and using lights rated for indoor or outdoor use accordingly.
Consider Special Lighting Effects
When it comes to creating a truly mesmerizing Christmas tree, don’t limit yourself to standard string lights. Consider incorporating special lighting effects that will add a touch of magic and uniqueness to your tree. Twinkly multicolor LED lights are a popular choice for those who want complete control over colors and patterns. These lights can be controlled through a smartphone app, allowing you to create stunning lighting displays that change at the touch of a button.
If you’re a fan of music, why not bring your favorite Christmas songs to life with music-syncing lights? These lights are designed to change colors and flash in time to the rhythm of the music, creating a synchronized and visually captivating experience for everyone in the room. It’s a surefire way to make your tree the center of attention during holiday gatherings.
Experiment with different special lighting effects to find the one that best suits your style and adds that extra touch of dazzle to your Christmas tree. Get creative and let your imagination run wild – the possibilities are endless!
Table: Special Lighting Effects for Christmas Trees
| Lighting Effect | Description |
|---|---|
| Twinkly Multicolor LED Lights | Allows you to control colors and patterns through a smartphone app |
| Music-Syncing Lights | Changes colors in time to your favorite Christmas songs |
| Flickering Flames | Adds a warm and cozy ambiance with the illusion of flickering candles |
| Flashing Lights | Creates a festive and energetic atmosphere with pulsating lights |
Techniques for Wrapping Christmas Tree Lights
When it comes to wrapping Christmas tree lights, there are a few techniques that can help you achieve a professional and polished look. Here are some tips to consider:
1. Use the Zigzag Method
One technique that experts recommend is the zigzag method. Instead of simply wrapping the lights around the branches in a circular motion, try zigzagging them back and forth. This creates a more even distribution of lights and prevents any gaps or clumps. Start by placing the lights close to the trunk and gradually work your way towards the outer branches.
2. Choose the Right Type of Lights
Not all Christmas tree lights are created equal. Consider using LED lights, as they are more energy-efficient and tend to last longer. Additionally, look for lights with adjustable settings, such as twinkle or fade effects, to add a touch of magic to your tree. Opt for lights that are specifically designed for indoor use and follow the manufacturer’s guidelines for maximum safety.
3. Use Extension Cords and Timers
To make the process of turning your Christmas tree lights on and off more convenient, use extension cords and timers. Connect your lights to an extension cord that can easily reach a nearby outlet, and then use a timer to automate the lighting schedule. This way, you won’t have to worry about remembering to turn the lights on or off each day.
By following these techniques, you can create a beautifully illuminated Christmas tree that will be the centerpiece of your holiday decorations.
| Technique | Description |
|---|---|
| Zigzag Method | Wrap the lights back and forth in a zigzag pattern for an even distribution. |
| Choose the Right Type of Lights | Opt for LED lights that are energy-efficient and have adjustable settings. |
| Use Extension Cords and Timers | Connect your lights to extension cords and use timers to automate the lighting schedule. |
Tips for Wrapping Christmas Tree Lights
When it comes to bringing a festive glow to your Christmas tree, properly wrapping the lights is key. Here are some expert tips to help you achieve a beautifully lit tree that will be a standout feature of your holiday decor.
Add Layers of Lights
For a more impressive display, consider adding multiple strands of lights to your tree. Layering different types of lights, such as tiny LED fairy lights or colored floor spotlights, can create a visually stunning effect. Be generous with the number of lights used to ensure a well-lit and captivating tree.
Weave the Lights
When wrapping the lights around the branches, make sure to weave them in and out to create a more organic and natural look. Place some lights deeper into the branches and some closer to the front to add depth and dimension. This technique will give your tree a beautifully layered appearance.
Hide Unsightly Plugs
To achieve a clean and seamless look, hide the plugs and cords of the lights. Push the green plug deep into the branches to make it less noticeable. Additionally, use floral wire to hold the lights in place if they’re not hanging exactly where you want them. Bend the loose ends of the wire towards the back of the tree for safety.
By following these tips, you’ll be able to wrap your Christmas tree lights like a pro and create a dazzling centerpiece for your holiday celebrations.
Tips for Wrapping Christmas Tree Lights
When it comes to wrapping Christmas tree lights, there are some important tips to keep in mind to ensure a beautifully illuminated tree. Here are some expert techniques and safety precautions to help guide you:
- Check and test the lights: Before beginning the wrapping process, inspect all the lights and bulbs to ensure they are in good working condition. Replace any faulty bulbs or strands to avoid any frustrations later on.
- Start at the base: Begin by securing the first strand of lights at the base of the tree, wrapping it around the trunk. As you work your way up, gently weave the lights in and out of the branches, creating a natural and balanced look. Adjust the positioning of the lights as needed to evenly distribute the glow.
- Hide the plugs: To maintain a seamless appearance, tuck the plugs and cords deep into the branches, concealing them from view. This will give your tree a clean, polished look and prevent any trip hazards.
- Use extension cords safely: If you need to use extension cords, make sure they are in good condition and rated for outdoor use if applicable. Avoid overloading the cords and always connect them to a ground fault circuit interrupter (GFCI) outlet for added safety.
- Regularly inspect for any issues: Throughout the holiday season, take the time to periodically check the lights for loose connections or damaged bulbs. Promptly replace any faulty components to ensure a continued and safe illumination.
“Wrapping Christmas tree lights is an art that can transform your tree into a magical centerpiece for the holiday season.”
Remember, the process of wrapping Christmas tree lights should be enjoyable and a chance to get creative. Experiment with different techniques and styles to achieve your desired look. By following these tips and safety precautions, you can create a beautifully lit tree that will be the centerpiece of your holiday decorations.
Consider Additional Lighting Options
When it comes to decorating your Christmas tree, why limit yourself to just string lights? Consider incorporating additional lighting options to add extra visual interest and create a truly unique and festive display. Novelty lights such as flickering flames, flashing lights, and bubble lights can bring a touch of whimsy and charm to your tree.
“I love using novelty lights on my Christmas tree; they really make it stand out and bring a sense of fun to the holiday decor.” – Lisa, Christmas enthusiast
These special lighting effects can be easily added to your tree by simply replacing a few strands of standard string lights. Whether you want a warm and cozy ambiance with flickering flame lights, or a playful and lively atmosphere with flashing lights, incorporating these options can take your tree to the next level.
Experiment with different combinations of novelty lights and traditional string lights to create a customized and eye-catching display. Consider using them in specific areas of the tree to highlight ornaments or create focal points. Remember to prioritize safety and ensure that all lights are properly installed and secure.
| Lighting Option | Description |
|---|---|
| Flickering Flames | These lights simulate the warm glow of real flames, creating a cozy and inviting atmosphere. |
| Flashing Lights | These lights add a playful touch to your tree, with intermittent flashes of light for a dynamic effect. |
| Bubble Lights | These classic lights feature colorful liquid-filled tubes that bubble and shimmer, adding a nostalgic charm to your tree. |
Transforming Your Tree with Additional Lighting
By incorporating additional lighting options, you can transform your Christmas tree into a stunning centerpiece that will captivate your guests and create a festive atmosphere. These unique lighting effects bring a touch of magic to your tree and make it truly one-of-a-kind. So go ahead, explore the world of novelty lights and let your creativity shine!
Conclusion
Wrapping a Christmas tree with lights is a magical way to bring holiday cheer into your home. By following expert techniques and considering safety precautions, you can create a beautifully illuminated tree that will be the highlight of your holiday décor.
Remember to determine the number of lights needed before you start, and start wrapping at the base of the tree, working your way up. Hide unsightly plugs and cords by pushing them deep into the branches and use floral wire to secure lights in place. Adjust the lights for a uniform look and consider adding special lighting effects for a personalized touch.
Whether you have an artificial tree or are decorating an outdoor tree, these tips will help you achieve a stunning result. Take the time to experiment with different wrapping techniques and lighting options to find the style that suits you best. Enjoy the process and create a Christmas tree that will bring joy and festive spirit to your home.
FAQ
How many lights do I need for my Christmas tree?
As a general rule, aim for approximately 100 lights per foot of the tree. Adjust this number based on personal preference.
Should I plug in the lights before starting to wrap the tree?
Yes, it’s recommended to plug in the lights before starting to ensure that all bulbs are working properly.
Where should I start wrapping the lights on my Christmas tree?
Begin the wrapping process at the base of the tree, securing the first strand of lights around the trunk. From there, work your way up, wrapping the branches as you go.
How can I hide the plugs and cords on my Christmas tree?
When connecting one string of lights to another, hide the green plug by pushing it deep into the branches. You can also use floral wire to hold the lights in place and bend the loose ends towards the back of the tree.
What should I do if I come across a drooping or unattractive branch?
Clip it from behind with a pair of florist shears to maintain the overall appearance of the tree and make it easier to wrap the lights evenly.
Is there a preferred wrapping technique for Christmas tree lights?
While the horizontal wrapping technique is the most common, some experts recommend starting from the bottom and working your way up in a vertical direction. Experiment with both techniques to see which one you prefer.
How can I add depth and personality to my tree with lights?
Weave the lights in and out of the branches, placing some deeper into the branches and some closer to the front to create a more organic and natural look.
How can I ensure safety when working with Christmas tree lights?
Avoid overloading circuits by using a ground fault circuit interrupter device. Be mindful of how many strands of lights are connected and do not exceed the recommended limit. Use lights specifically rated for exterior use for outdoor trees and always plug into a ground fault circuit interrupter.
How can I adjust the lights for a uniform look?
Step back and squint your eyes to view the tree. Look for any dark spots or areas with too many lights. Adjust individual lights or add an extra strand to achieve a uniformly lit tree.
Are there any special lighting effects I can incorporate?
Consider using Twinkly multicolor LED lights that can be controlled through a smartphone app or music-syncing lights that change colors in time to your favorite Christmas songs for a unique and personalized touch.
How should I wrap lights on an artificial tree?
Wrap miniature tree lights around the branches, being sure to light each section separately. Use the same techniques as with real trees, such as wrapping branches and creating a more layered look. Always use lights rated for indoor use.
How should I decorate outdoor trees with lights?
Use lights specifically rated for exterior use and opt for white, blue, or green lamps for floodlights. Use plastic gutter clips to securely attach the lights to the eaves and organize the cords neatly for a clean appearance.
How can I ensure safety and maintain my lights?
Never plug more than two extension cords together, use cords of the appropriate length, and make sure all lights have the same wattage to prevent power surges. Test the lights before installing them on the tree and regularly check for loose connections or damaged bulbs.
Can I use additional lighting options for my Christmas tree?
Yes, consider incorporating other types of novelty lights such as flickering flames, flashing lights, and bubble lights for added visual interest.

